
Hello Sunday!
So a while back in May 2015, I decided to make a present for my mother’s birthday, and since most women love flowers, I decided to attempt to preserve a flower in resin. As long as you have enough experience using PE Resin, this is a pretty simple but beautiful project to do, and the effect will last for many years if done well. Mine still hasn’t shown any signs of aging in over a year, and I doubt it would do so in any time soon.
Materials used-
- Flower Plant(Rose)
- Clear glassware(fused bulb)
- String
- Polyester Resin
- Copper Wire(or any other stiff wire)
- Tape
- Epoxy Putty(M-Seal)
Tools-
- Scissors
- Junior Saw
- Needle nose pliers
- Hairdryer or heat gun
Process
I started by locating a suitable glass item to use. I decided to use a bulb because I had one available, but other glass objects like bottles and jars will also work well.
I used a Jr saw to cut the epoxied base of the bulb off, and removed the filament & glass inside with a pair of needle nose pliers. I then thoroughly cleaned it with water and set it aside to dry making sure that I’d removed the print on the bulb. Next, I went to a florist to purchase a flower to place inside the bulb, but I found that all the blooms he had were far to large to fit inside the opening of the bulb, so I instead selected a rose bush from my garden.
Select a suitable rose bud which can fit inside the glass bulb, and has yet to bloom. Once you’ve located such a bud, take some string and tie a harness around the bulb like so.

Next, insert the bud into the bulb, and tie the bulb to any supports such that it doesn’t put strain on the bud. Multiple strings in different directions will help in stabilizing the bulb against wind and rain.
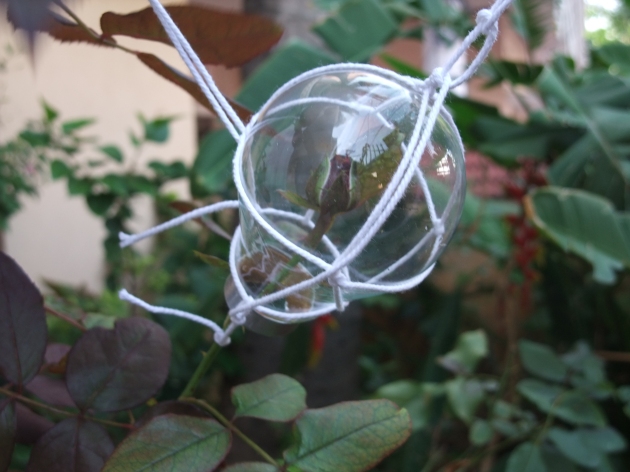
(Note the string tying the bulb’s harness to the rose stem, and that the rose stem isn’t drooping with the bulbs’ weight)
Now we wait, for there is no hurrying nature. This isn’t a good last minute project, but the beauty and timelessness of it makes it worth the wait. Remember to check it daily, until it blooms. You also may want to attach a suitably threatening warning message to the strings to ward curious fiddlers away.
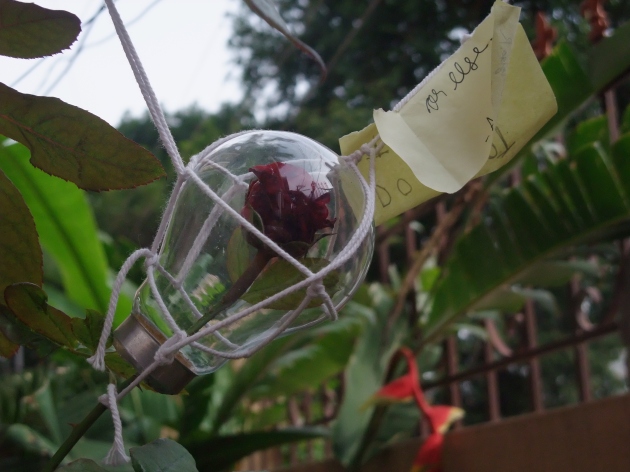
(Behold rose in bloom, and said warning note)
Once the rose has bloomed fully, chop its stem off a few inches from where it leaves the bulb, and cut the harness’s support strings. Relocate the bulb to your resin workspace, and secure it upside down like so.
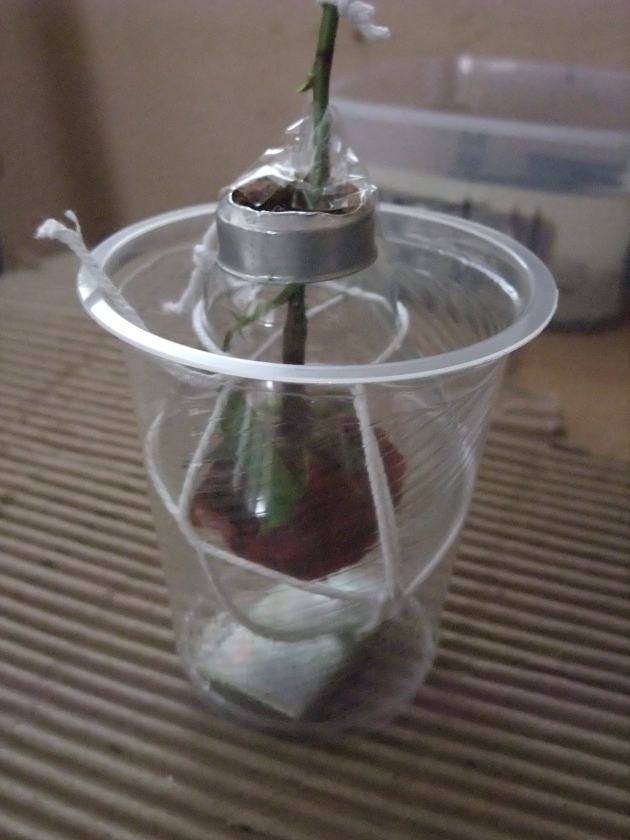
(Cups are great for this)
Use a hairdryer or low temp heat gun to gently warm the inside of the glass bulb. Be very careful while doing so, glass has a tendency to crack when exposed to sudden rapid temperature change. This step is important to dehydrate the rose, as well as to remove any dew or moisture inside the bulb. This is vital because polyester resin hates water, which can inhibit curing or cause a host of other issues. After a few minutes of warming it, use tape to suspend the rose inside the bulb’s center as shown above.
Now comes the “fun” part, to mix and pour the resin. WARNING! Polyester resin is a very hazardous chemical, and if you value your brain cells you must use VOC rated respirators (Volatile Organic Compound), eye protection, and nitrile/latex gauntlets. Wearing a plastic apron and old clothes is recommended too.
My PE resin came from a local supplier, who sold it along with a pair of bottles of catalyst and accelerator. The ratio for mixing is 100:2:2 by volume. The resin is somewhat pale amber in colour, and the catalyst is clear, but the accelerator is a lovely indigo shade. This meant that the resin stayed mostly clear until I add the accelerator, which turns it opaque. So in order to preserve its transparency, I mixed together only the resin and catalyst. If you can get crystal clear resin, that would be far better.
Prepare the area by laying a dropcloth or newspapers, double check safety equipment, object to cast resin into, and keep a small disposable container beside the casting object, so that you can empty the excess resin into it. Mix together more resin than you require, a little wastage is better than a little shortage, and the excess can be poured into another container to use for other purposes like lathe work or the like. It also helps having an external sample of that exact resin batch, for checking if it has cured fully. You could also reuse the same excess container multiple times, casting each new batch over the previous batch, to create a layered block which tells the history of your castings.
Once you’ve mixed the resin, carefully pour it from a height into the bulb. Keep pouring in the same spot until you’ve filled the bulb up to the very brim. You have to be careful not to pour on the outside of the bulb, or the final effect will be diminished. If there is any spill, wipe it up immediately after casting, and clean the external surface of the bulb with acetone. Pour the excess into a disposable container, and if you have a vacuum degassing chamber, now is the time to use it. I personally don’t have one, but the results turned out fine none the less. After casting, my bulb was completely filled with little bubbles, and I thought it would be ruined for certain, but the next morning, the bubbles had disappeared completely, either due to shrinkage of resin or some other reason.
Now once again, we wait for it to cure. I didn’t add any accelerator, so this will take much longer, so take this time to catch up on reading or gaming. Check the bulb after a couple of days, and observe your handiwork. Poke the excess resin pot to check how cured it is. An unusual unexpected side effect of the resin was that it completely bleached the rose, turning it from dark red to nearly white. Furthermore, because the resin filled the interior of the bulb, it acted as a convex lens, making the rose appear to fill up the bulb entirely, which has a great effect to make people wonder how you managed to stuff such a large delicate rose into such a small bulb. The resin was still mildly tacky inside the bulb, so I “corked” the end up with a little white M-Seal(Epoxy putty), completely sealing the open end of the bulb.
I theorize that due to the toxic nature of resin, all the microorganisms in and around the rose were killed, and the rose was soaked in the resin, essentially preserving the rose forever(read: A very long finite period of time that may well exceed your own lifespan). I don’t think the Beast would have had any issues with withering flowers if Bella had frozen his rose in resin(although that might have killed the rose (❁°͈▵°͈)…).
Here are the end results,
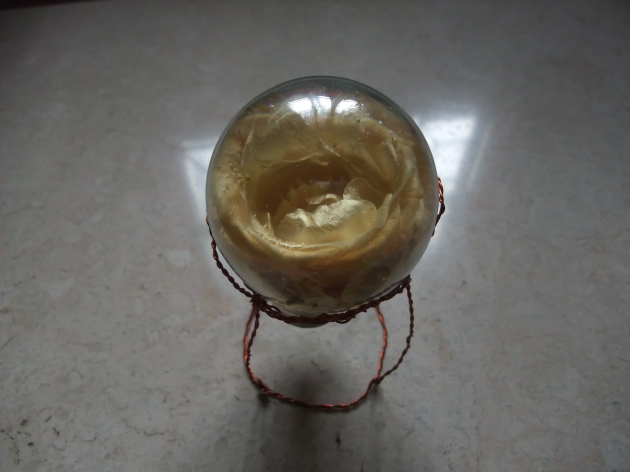
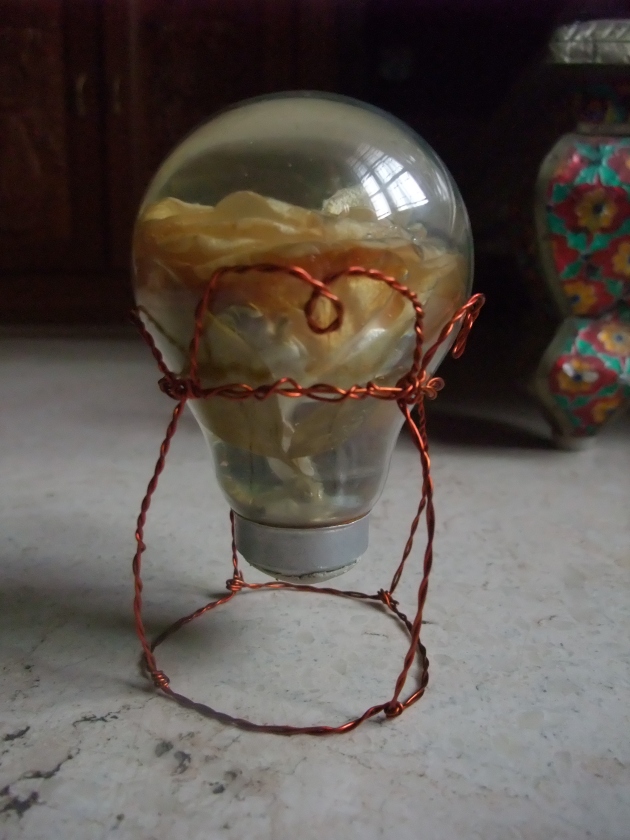
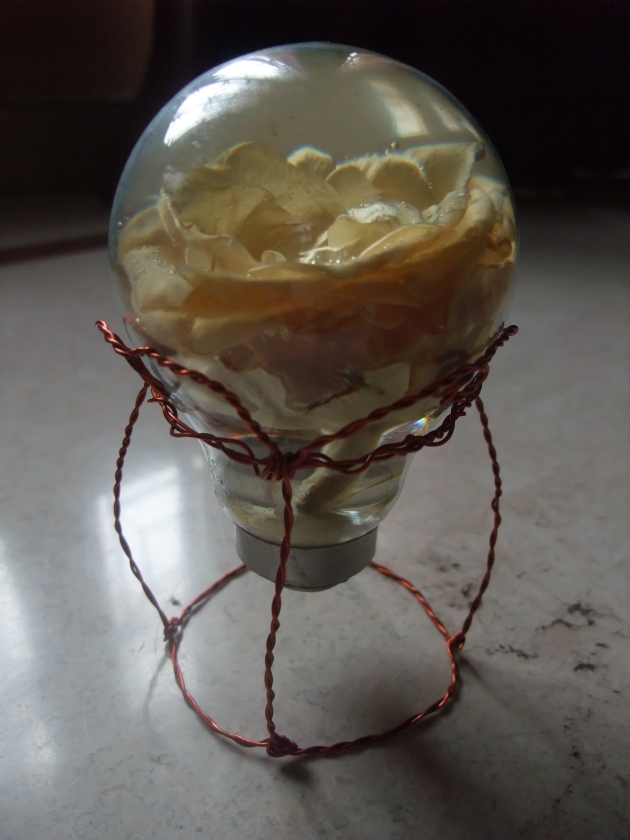
As you can see, I made a simple stand for the bulb out of some twisted copper wire, although I recommend either some thicker or stronger wire, as my thin wire was rather wobbly. My mother really appreciated the present, and this makes a great unique gift for anyone.
Thank you for reading, and I hope you enjoyed this build log, and that you put this knowledge to good use. If you do make it, please do upload pictures of it, I would love to see your work. Feel free to follow or bookmark if you keep up to date with my uploads.
Carry on crafting!
Signing out,
Adithyaa
